
Before the event
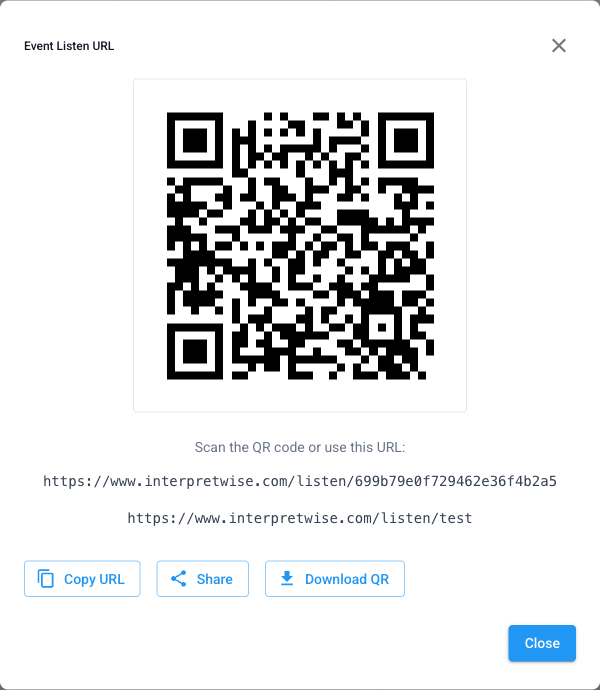
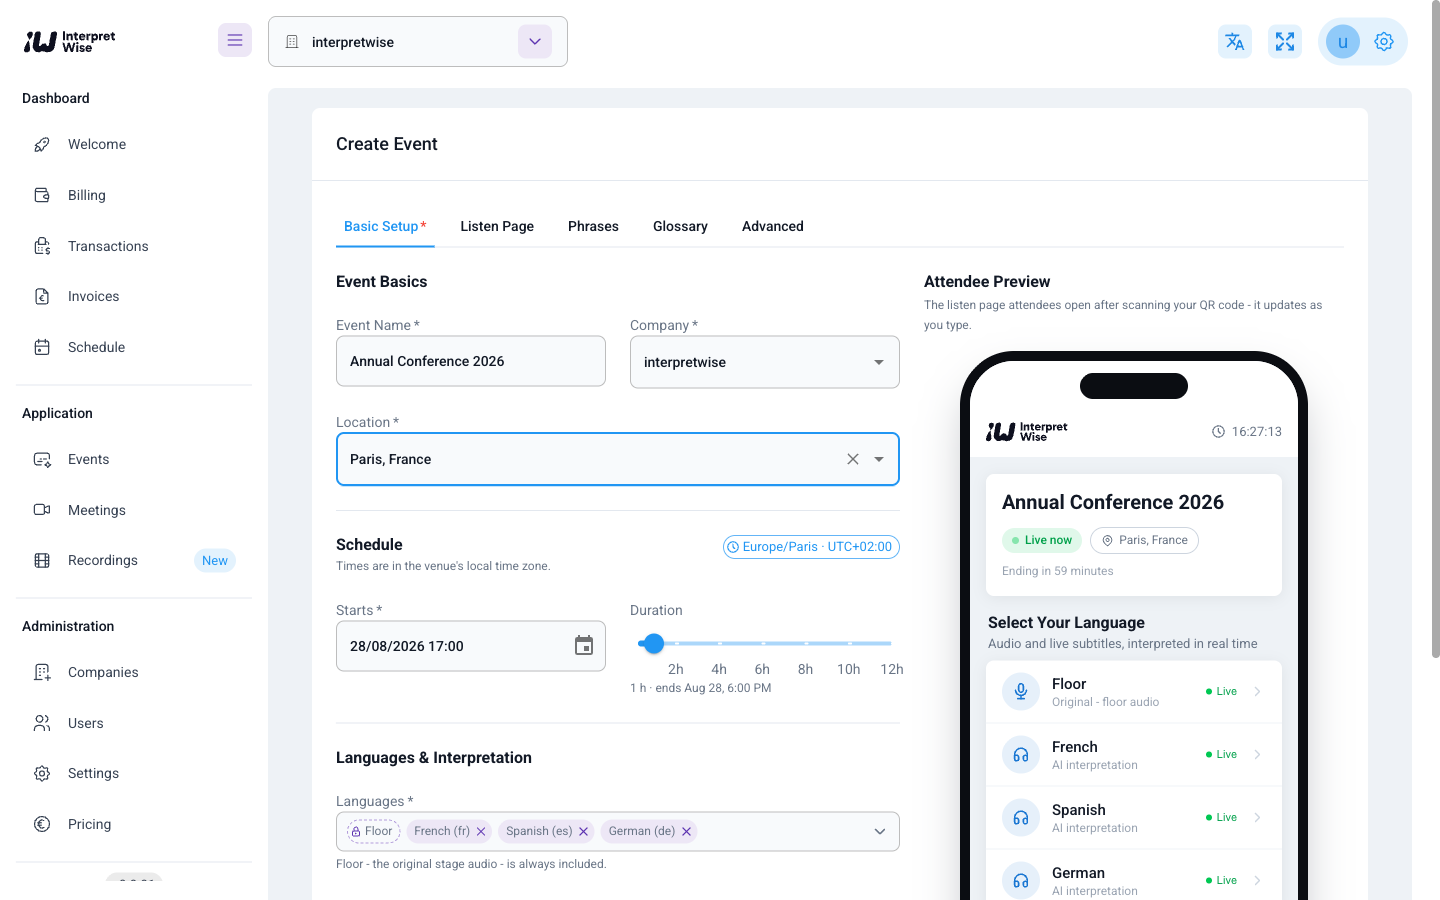
Create the event in the dashboard: name, date and time, location and the language line-up. The event immediately gets its own listen link, event code and QR code, plus a live preview of exactly what attendees will see. Set-up takes about 15 minutes.
Step by step
- 1
Create the event
Name, date and time, location and languages. Add your glossary and key terminology in the same wizard.
- 2
Configure the channels
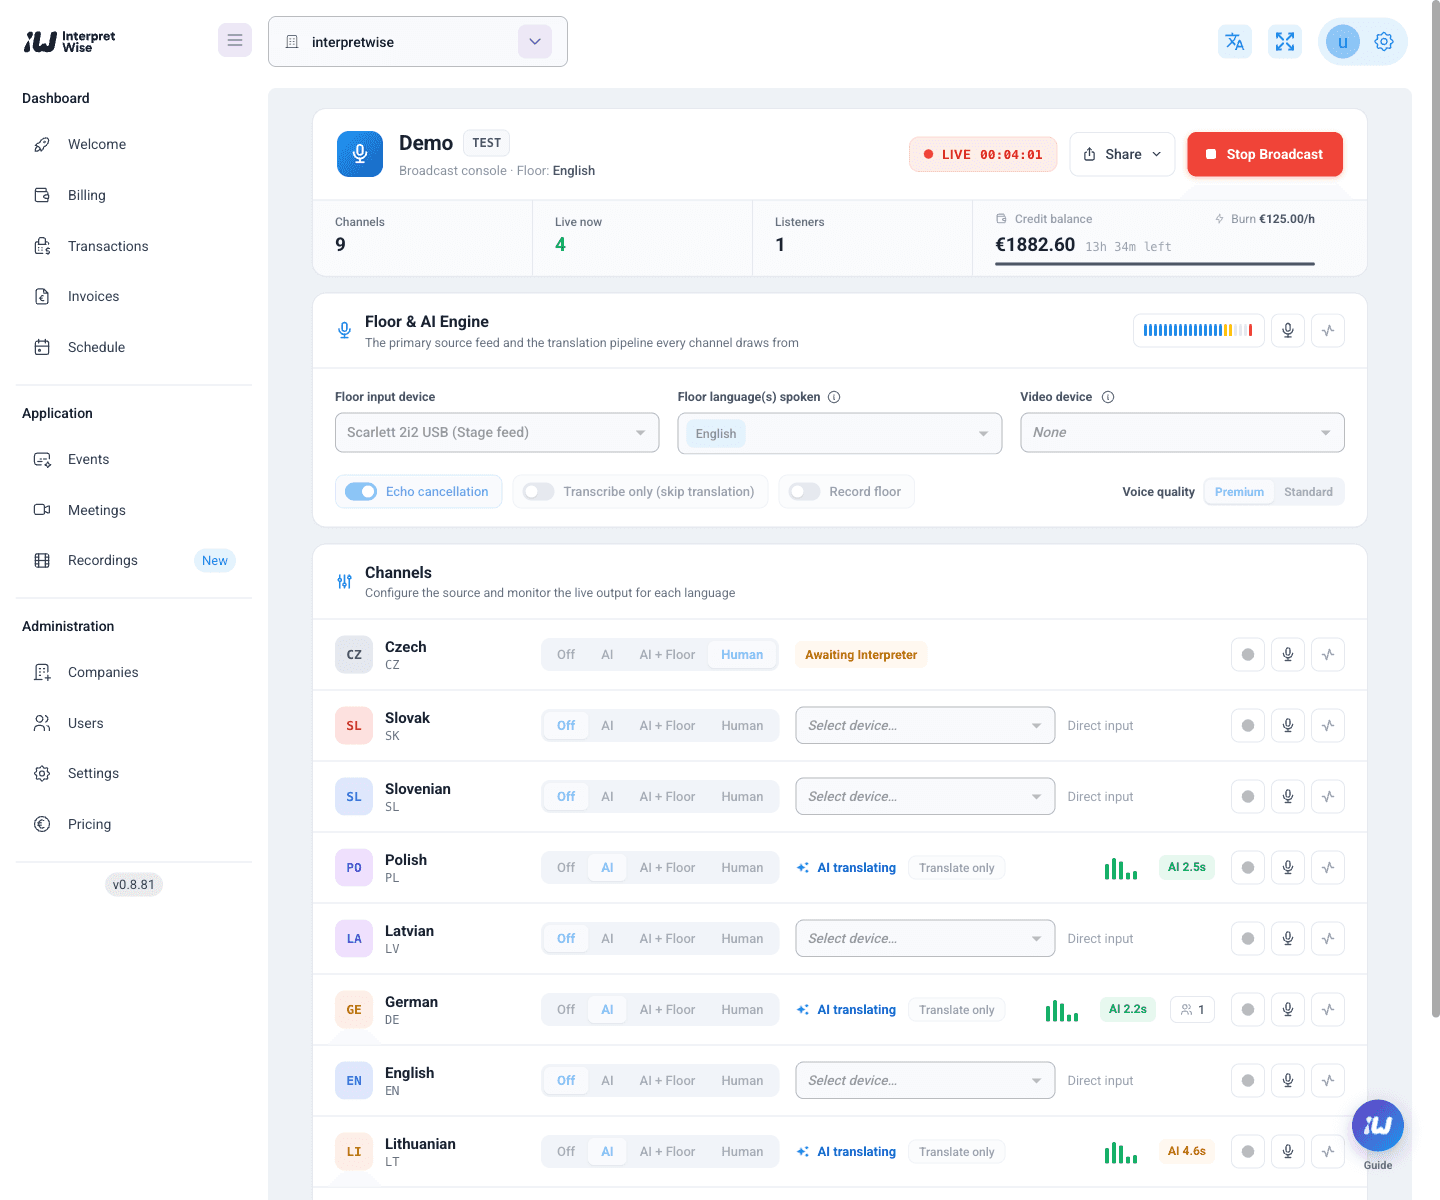
For each target language choose AI voice, AI voice over attenuated floor sound, captions only, or a human interpreter - and tick which channels to record. Pick the floor input: the USB interface carrying your console feed.
- 3
Sound-check and go live
The console shows input levels and the projected hourly cost before you start. One button starts every language at once.
- 4
Share access
Put the QR code on screens and badges; remote viewers get the same short link.
- 5
During the session
Live transcripts, per-language listener counts and pipeline health in one view. Recordings, transcripts and the latency report collect automatically afterwards.
The broadcast console
The console is the operator's single screen for the whole event:
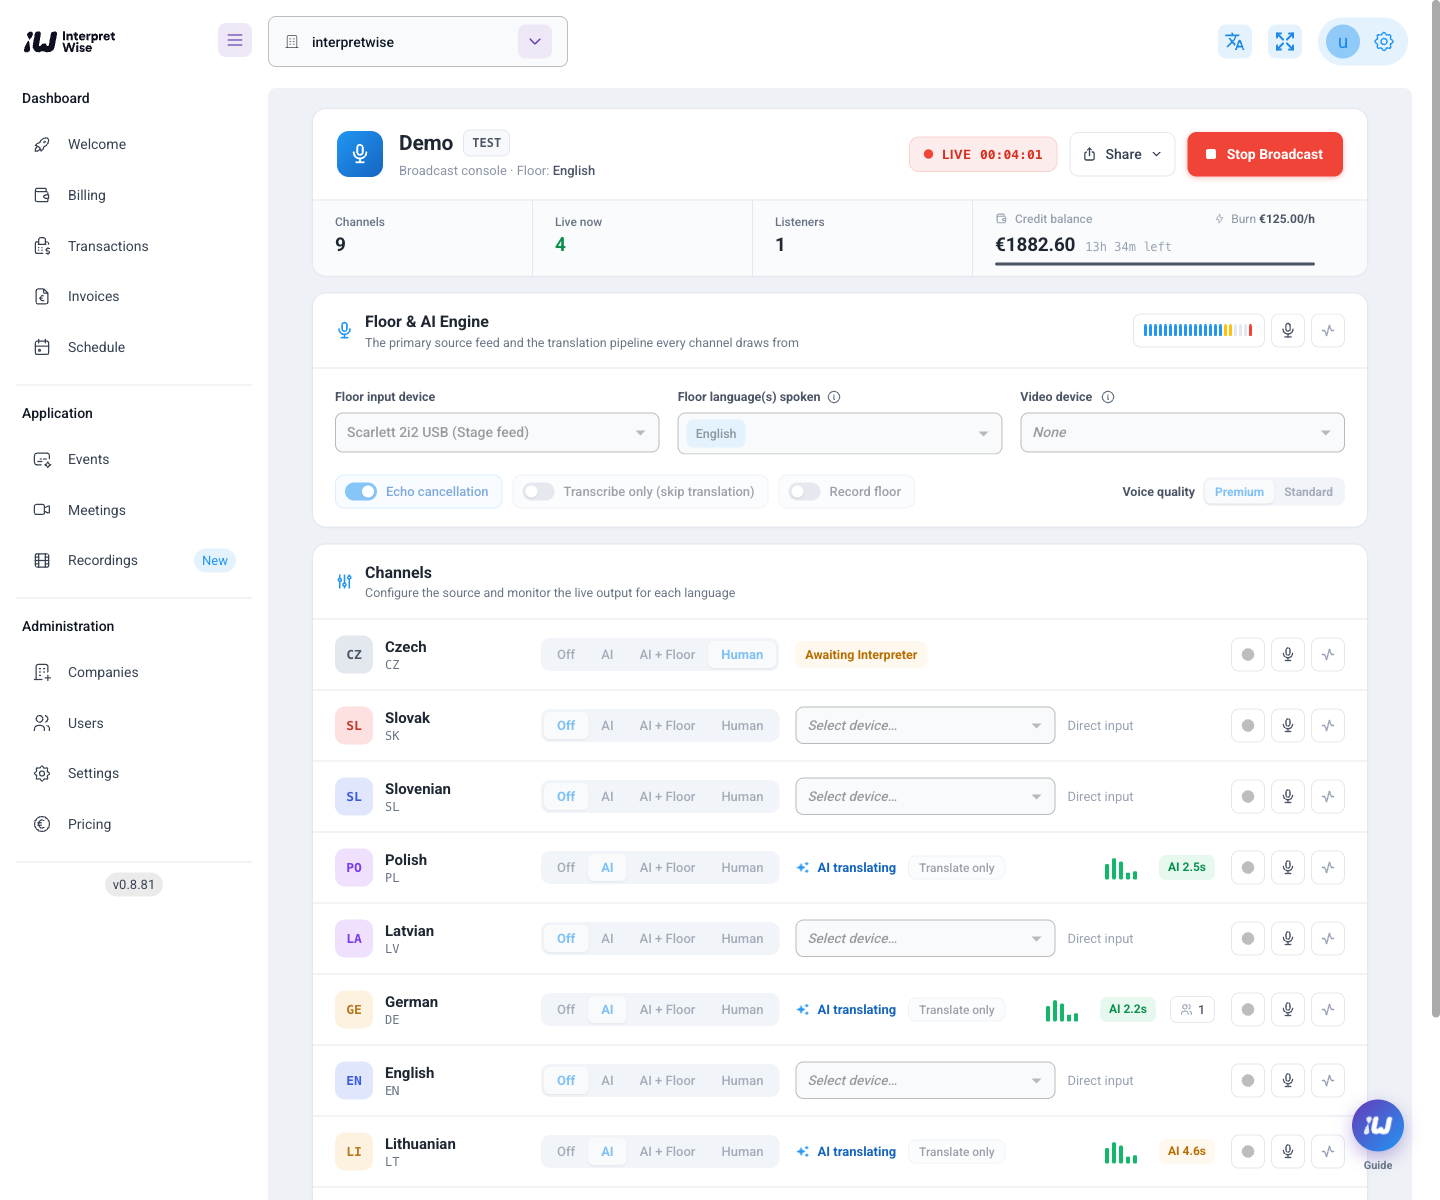
- Live operator view - Live transcripts, per-language listener counts, audio levels, pipeline health and running cost in real time.
- Built for board feeds - 48 kHz stereo capture with automatic gain control and noise suppression disabled, so a clean console feed stays clean.
- Session recording - Optionally record the original floor and any interpreted language server-side; each becomes a separate MP3 with matching transcripts.
Sharing access
Every event has an unlisted listen link and a short event code. Show the QR code on screens, print it on badges, or send the link through your registration emails - attendees join in seconds, with nothing to install.